Installing Threat Monitoring on a non-UKFast server
Note
This documentation is for setting on a non-UKFast hosted server with Threat Monitoring. Instructions on how to install Threat Monitoring and Response on a UKFast hosted server can be found in our Installing Threat Monitoring on a UKFast hosted server documentation.
Threat Monitoring can also be installed on servers that are not hosted with UKFast, allowing you to secure and protect all parts of your IT infrastructure via one centralised threat defence platform.
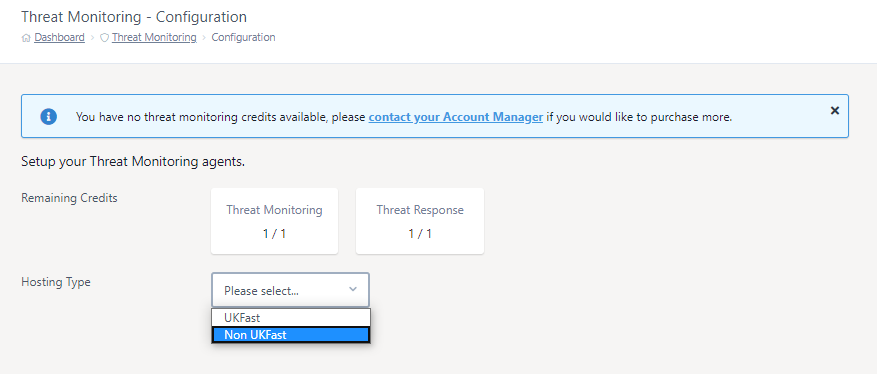
To begin, log into MyUKFast and visit the Threat Monitoring new agent configuration page then select Non UKFast from the Hosting Type drop-down option.
Note
Threat Monitoring only supports a specific set of operating systems and configurations. Please make sure your server meets the minimum required specification and required requirements as defined in our System Requirements documentation.
1) Add an API token
Firstly, generate or use an existing UKFast API application token. This application token will be used to communicate with the UKFast public API to register a new threat monitoring agent. If you already have a UKFast API application token with permissions to access Threat Monitoring, you can enter it in the box provided, as shown below.

If you don’t have an existing API application token, or would like to generate a new application token, you can generate one by pressing the blue Generate Application Token button provided, as shown below. The generated token will be entered into the text box for you. Furthermore, application tokens can be managed via the API applications page.

2) Setup firewall
Before configuring your agent, verify that that the target server has the correct firewall ports open to communicate outbound to both the UKFast API servers and the Threat Monitoring ingest servers, the required details are shown below.
Destination IP |
Destination Port |
Protocol |
Description |
|---|---|---|---|
185.234.39.17 |
443 |
TCP |
UKFast API servers |
178.238.133.128 |
443 |
TCP |
Threat Monitoring ingest servers |
Communication can be tested on a Linux system using a utility like netcat, an example command to verify communication is shown below. Please note the netcat command may be mapped to the nc command instead on some linux distributions.
Command
netcat -z -v 185.234.39.17 443
Success Response
Ncat: Version 7.50 ( https://nmap.org/ncat )
Ncat: Connected to 185.234.39.17:443.
Ncat: 0 bytes sent, 0 bytes received in 0.02 seconds.
3) Configure and install
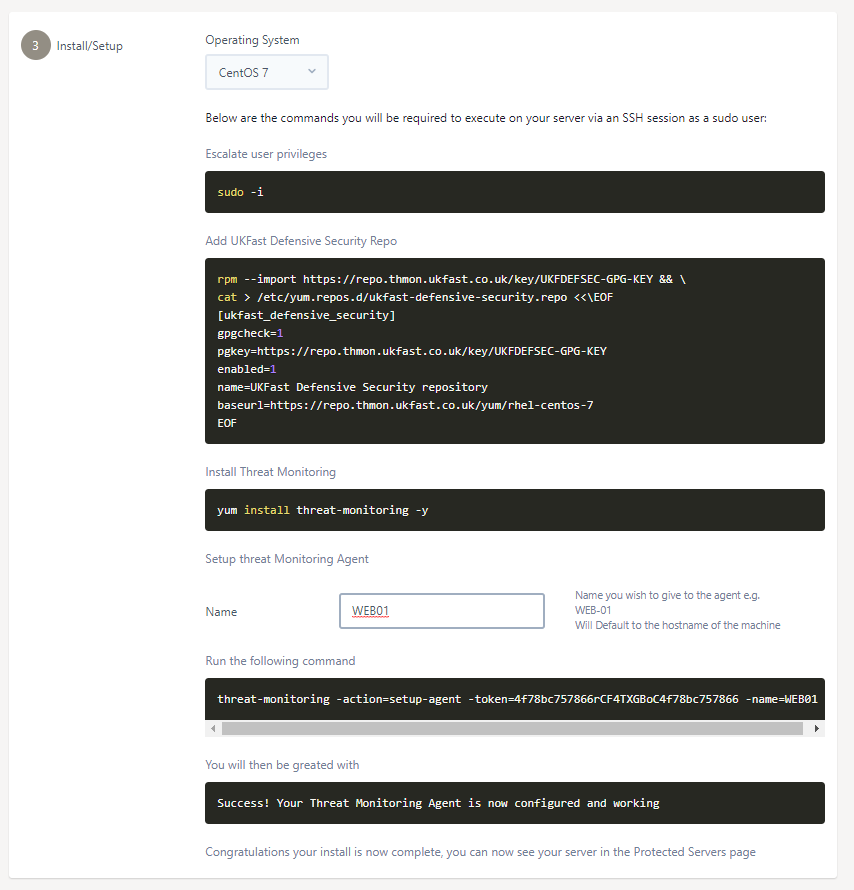
Next, select the operating system type of the target server via the provided Operating System drop-down as shown below. Please note operating systems that are not shown are not supported on non-ukfast Threat Monitoring installs.

Upon selecting your OS, the needed commands will be shown to you. These commands will need to be run via the command line via a terminal like SSH on your server.
The provided commands will attempt to escalate to the privileged root user.
sudo -i
If your current user is not able to escalate it’s permissions to the root user or is not able to run the sudo command, please re-try from a different account with the correct permissions. Alternatively, you may run the commands using the root user directly.
When you have root access, please continue to install our UKFast Defensive Security yum or apt package repository onto your server and then install our Threat Monitoring package and its dependencies via the commands shown on your MyUKFast page. An example for a CentOS 7 installation is shown below.
[root@my-server ~]$ rpm --import https://repo.thmon.ukfast.co.uk/key/UKFDEFSEC-GPG-KEY && \
cat > /etc/yum.repos.d/ukfast-defensive-security.repo <<\EOF
[ukfast_defensive_security]
gpgcheck=1
pgkey=https://repo.thmon.ukfast.co.uk/key/UKFDEFSEC-GPG-KEY
enabled=1
name=UKFast Defensive Security repository
baseurl=https://repo.thmon.ukfast.co.uk/yum/rhel-centos-6
EOF
[root@my-server ~]$ yum install threat-monitoring -y
Once the package has been installed successfully, you need to perform 1 final step to link your server up to our Threat Monitoring infrastructure.
Before we do that, you have the option of setting a custom friendly that will later be shown in any Threat Monitoring dashboards when referring to this server. You can either specify this optional manually using the -name=NAME_HERE flag, or by entering your desired server in the Name text box provided on the MyUKFast installation page. Updating this text box will automatically update the commands that we need to run next.
Finally, run the provided command to complete your install. Upon completion, you should see a success message reading, Success! Your Threat Monitoring Agent is now configured and working.
An example MyUKFast configuration setup is shown below.
If you do encounter any issues during installation, please raise a support request.
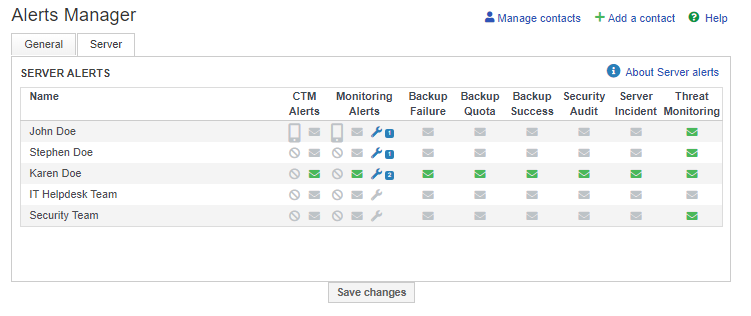
4) Setup email contacts
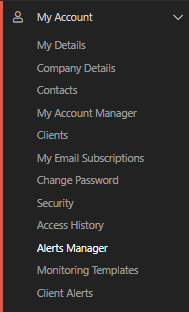
To receive email alerts for suspicious events, you will need to configure email alerts via MyUKFast. To do this, go to the Alerts Manager section under “My Account”, as shown below.
On the “Server “ tab, you will see a table of contacts and the types of alerts they have been configured to receive.
To set a contact to receive Threat Monitoring alerts, press the letter icon next to their name under the Threat Monitoring column and then press the “Save Changes” button, an example is shown below.