Quick-start
This aim of this guide is to take a brand new UKFast loadbalancer and configure it with a relatively standard set of rules. The setup will be one VIP listening on both HTTP and HTTPS, passing traffic back to two servers.
Note
All the following steps can be carried out on a UKFast loadbalancer through your MyUKFast area accessible here
Terminology
Here’s a brief rundown of some of the terms that will be used throughout this guide and in the loadbalancer interface:
Virtual IP- A Virtual IP (VIP) is the frontend IP address and associated service in a loadbalanced solution.Service- The protocol that a VIP uses. These can be eitherHTTP,HTTPS,HTTPS OffloadedorTCPServer Group- A server group is a collection of backend servers. Each VIP points to a server group.Backend Server- One or more backends are contained within a server group, determining where traffic is delivered.Passthrough- A listener with a protocol ofHTTPSis said to be operating in passthrough, as traffic is sent directly to the backend server on port443without any decryption.Offloaded- If theHTTPS Offloadedservice is used thenHTTPStraffic on the loadbalancer is decrypted before being sent to the backend servers on port80. This has the benefit of allowing layer 7 actions to be carried out on the traffic.
Configuring your first server group
Creating the Server Group
First things first, we need to set up a server group, which will ultimately determine where traffic is going to go.
With your loadbalancer open in MyUKFast, you should be confronted with something like the following:

Click into the Server Groups tab and then hit the Create Server Group button to get started. You should then have the following screen:
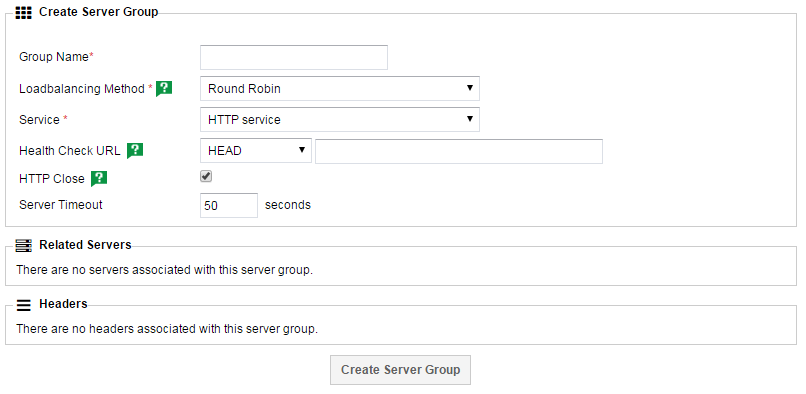
Here’s a breakdown of the fields:
Group NameThis is just a friendly name for you to identify the group by, though it should be unique. Something memorable, short yet descriptive is advised.
Loadbalancing MethodYou’ve got three options here,
Round Robin,Least ConnectionsorSource IP. These methods determine how traffic is distributed between your backend servers. Most people should probably stick withLeast Connectionsas this method intelligently sends traffic to the backend that has the least connections at any one time.Round Robinwill blindly send traffic first to server A, then to server B, then to server A etc. This has a slightly lower overhead but can lead to hot-spots developing if sticky sessions are in use.Source IPis quite different. The source IP address of the request is hashed and then this is used to determine which backend server should be used. It ensures that that IP will always end up on the same backend server providing no servers are added or removed from the pool.ServiceThe protocol being handled by the backend servers. In the vast majority of cases, you just need to use
HTTPif you’re dealing withHTTPtraffic andHTTPSif you’re dealing withHTTPS, the only exception to this is if you’re employing SSL offloading.TCPshould be used for traffic that isn’tHTTPorHTTPS.
Advanced Options - These options are not mandatory and can safely be left as their defaults unless you’re comfortable with changing them.
Health Check URLUsed to specify the health check used in determining if a backend server is healthy or not. Left blank, the default health check will be used, which essentially checks the HTTP status code of the default site on the backend server. If the status is >=200 and <400 it’ll be deemed valid for receiving traffic. If the default site isn’t suitable for this, or if it doesn’t respond in 3 seconds, it’ll be better to set up an alternative health check URL. If you were to use the example of
example.com/health.phpas your health check URL, then each backend server would be tested in a way best described ascurl -IH'Host: example.com' 1.1.1.1/health.php, where1.1.1.1is the IP of the backend server.HEAD/OPTIONS/GETare different HTTP verbs that you can use when carrying out the health check. If you’re not sure which one to pick, stick withHEAD.HTTP CloseThis option is best left enabled. If disabled, connections will be left open to the backend sever for re-use. Whilst this does have a slightly lower overhead, it does have an impact on any injected headers (such as
X-Forwarded-Forwith SSL offloading) as it’s only injected on the initial packet in any HTTP transaction.Server TimeoutThe amount of time that a connection will be kept open to the backend server before timing out. If you have any long running transactions or scripts that run through the load balancer, you may want to increase this.
With this filled in, you should have something to the following:
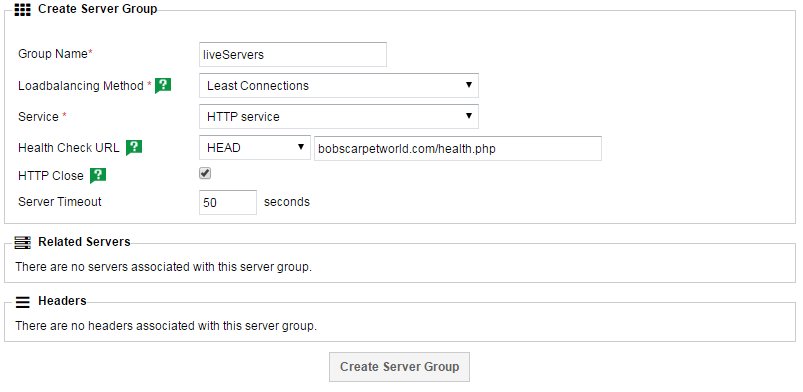
Press the Create Server Group button to save it and then move onto the next section to add some servers into your new group.
Adding servers to the group
Back on the Server Groups tab, you should now see the group you just created. Click on it to get a screen similar to the following:
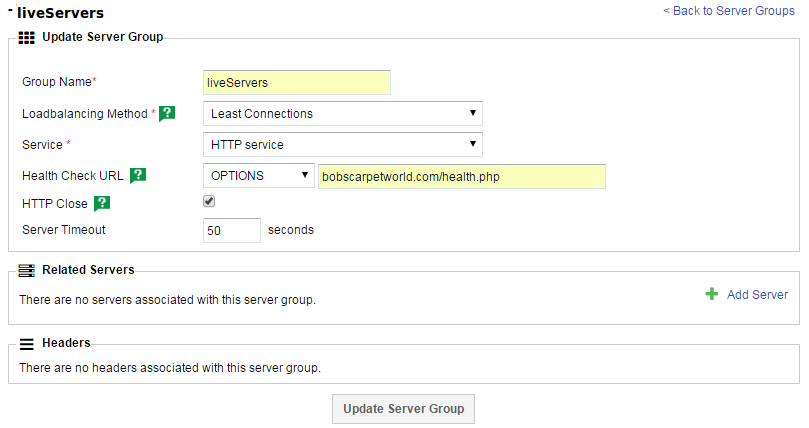
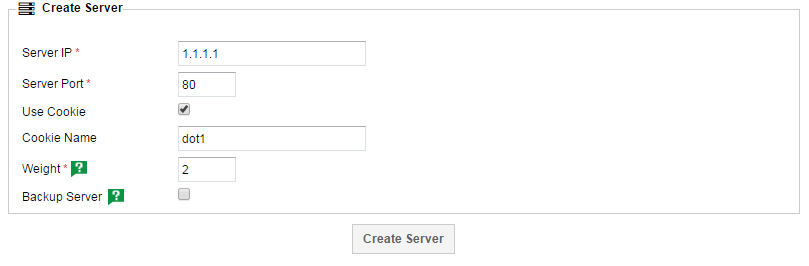
Press the Add Server button under the Related Servers section to start adding to this group, landing you on a screen like this:
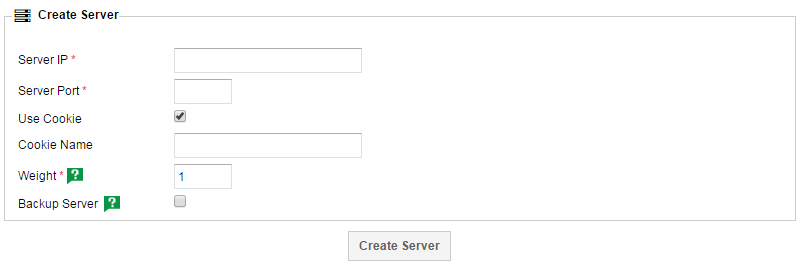
Here’s a breakdown of the fields available to you:
Server IPThe IP of the backend server, where traffic should be sent. If you’re adding a UKFast IP into here, it should recommend available servers, though any IPs can be typed into here. If your loadbalancer is behind a dedicated firewall, please note that you should use the internal IP addresses of any backend servers. If you’re unsure, please contact support_ for assistance.
Server PortThe port to which traffic should be sent. In most instances, if you’re dealing with
HTTPtraffic then this should be80and if it’sHTTPSthen it should be443. Again, the only exception to this is if you’re using SSL offloading, in which case the backend should be80as explained in </myukfast/loadbalancing/passthroughoffload>. If you’re using theTCPoption then you should already know what port you’re dealing with here.WeightThe weighting is essentially the ratio used to determine how much traffic is sent to each server. If you have two servers and they both have a weighting of
1then the ratio is1:1and they’ll both receive50%of the traffic. If you weight them2:1then one will receive twice as much traffic as the other, and so on. If you add more servers in, the ratio expands out as you’d expect. If you have 4 servers all weighted 1, they receive 25% each, if you have them weighted 3, 3, 1, 1 then the first two will receive 3 times as much traffic as the second two.Advanced Options
These options are not mandatory and can safely be left as their defaults unless you’re comfortable with changing them.
Use CookieThe loadbalancers use cookies as a method of setting up
sticky sessions, which is a way of ensuring that a visitor ends up on the same backend server each time (for example, so that they don’t lose their basket on an eCommerce site). If this isn’t important to you, you can disable the cookie here and visitors will be distributed using whatever loadbalancing method you selected previously.Cookie NameAllows you to name the cookie mentioned above. By default it’ll use a randomly generated string. Setting a name such as
dot115is an easy way of seeing which backend server you’ve arrived on, and also allows you to set the cookie manually to force yourself onto a particular backend, but please be aware that using a simplistic naming convention like this may allow people to guess the IP addresses of your backend servers.Backup ServerCompletely unrelated to any backup solution your may employ, this is actually a way of denoting a server as a stand-in, so that it only receives traffic if all other servers are failing their health checks and are therefore offline. Setting a server to
Backupand changing it’s cookie name is a quick way to ensure that no people are heading to a particular server.
With all that filled in, you should have something like this:
Now press Create Server and then repeat this step to add more servers to your group as necessary.
With another server added and carrying on with my above example, you should now have a server group screen that resembling something like this:
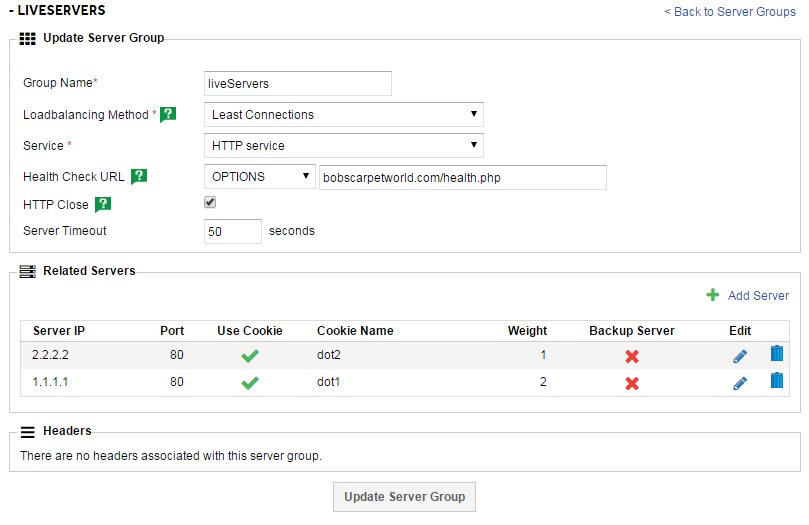
With that complete, it’s time to move onto adding a VIP so that we can direct traffic to our new group.
Configuring your VIP
Back on the initial page for your loadbalancer, you should head over to the Virtual IPs tab:
Press the Create Virtual IP button to get started, bringing you to this page:
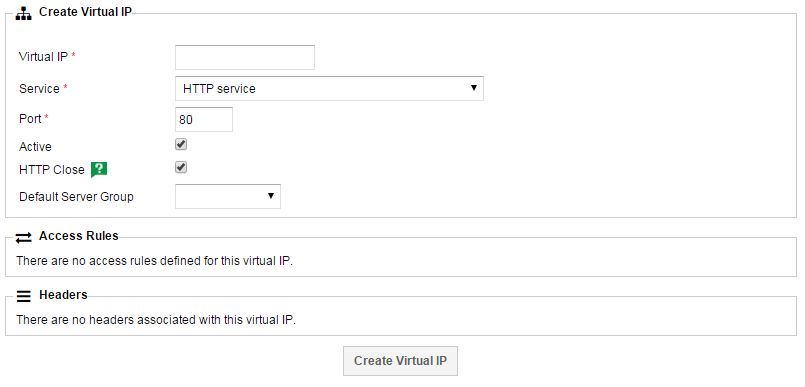
Once again, here’s a breakdown of the fields available to you:
Virtual IPThis is where you define the
VIPitself. The field should automatically recommend available IPs, but support_ can help you identify which are available to you if you’re unsure. It’s possible that you many need to purchase more IP addresses if you don’t have any available. If this is the case, your account manager will be able to help.ServiceAs mentioned in the terminology section, this is the protocol that a VIP uses. These can be either
HTTP,HTTPS,HTTPS OffloadedorTCP. SSL offloading is a bit more complex and is explained in here: </myukfast/loadbalancing/passthroughoffload>.Default Server GroupThis is the main event, this drop down allows you to select which set of server group you want to send traffic to. Select your server group you named with
Group Namein the previous section.Advanced Options
These options are not mandatory and can safely be left as their defaults unless you’re comfortable with changing them.
PortThis should be automatically populated by your choice of service and should be left at that unless you’re certain you need to use a non-standard port.
ActiveSimply allows you to activate or deactivate a whole
VIP. If you untick this, theVIPwon’t work.HTTP CloseSame functionality as on the server group, this option is best left enabled. If disabled, connections will be left open to the backend sever for re-use. Whilst this does have a slightly lower overhead, it does have an impact on any injected headers (such as
X-Forwarded-Forwith SSL offloading) as it’s only injected on the initial packet in any HTTP transaction.
Filled in, it should look something like this:
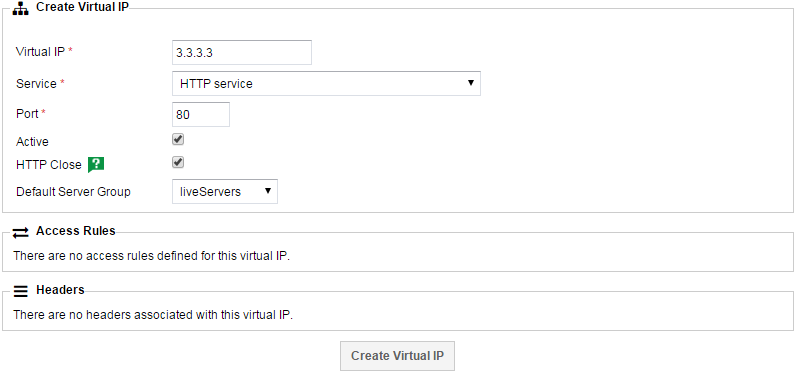
Press Create Virtual IP to save it and then repeat the step for any other services you may need.
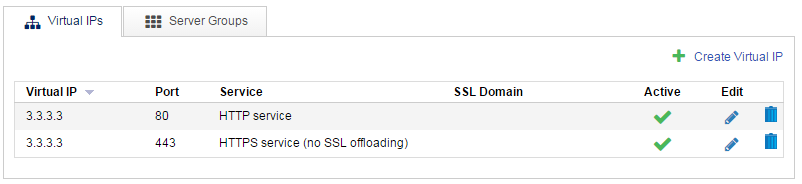
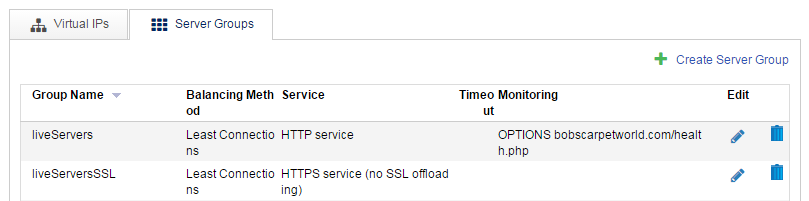
Here’s a series of screenshots showing my final setup:
Note
Note the inclusion of a second server group called liveServersSSL. This is the HTTPS equivalent of LiveServers that the HTTPS VIP points to.
Virtual IPs
Server Groups
Put it all live
With all this set up, you’re almost live, you just need to tell the loadbalancer to reload its configuration. This can also be done using through MyUKFast, indeed you should have been seeing the following banner since you started making changes:

Click Reload Load Balancer Config to push it up to the loadbalancer and put it live. Providing there weren’t any issues with what you configured, it should be live a few seconds later. If you have any issues with this step, or if you see unexpected behaviour, it’s worth contacting support for assistance.
Going Forward
This has been a rundown of the basic functionality of the UKFast loadbalancers, but there’s far more you can do with them! The other guides in the loadbalancer category will discuss topics such as setting up SSL offloading and using access control lists to divert visitors to different locations based on various layer 7 quantifiers.